Porn Tacos, Not Just A Euphemism


porn0a

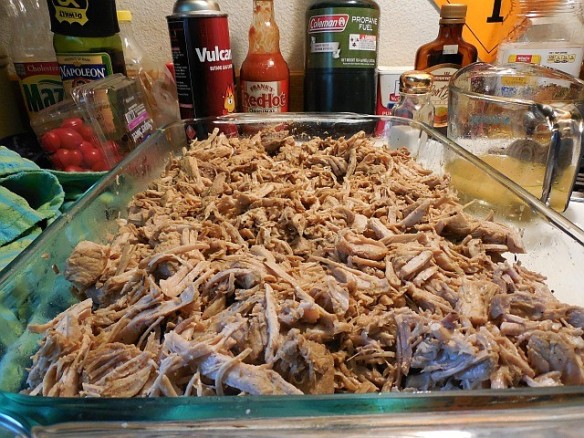
All this could be yours…


These tacos have become a staple in my bag-o-tricks. Savory, tangy, tart and sweet, they’ve got everything! I’m sure we’ve all seen a bit of porn and I know we’ve all eaten a taco so why not combine the two?

Okay, before you start thinking the ingredients have to come out of your own or others’ pants, I need to assure you there’s no actual porn in the recipe, sorry. You can cook it bow-chicka-wow-wow nekkid if you really need to go there though.

porn1

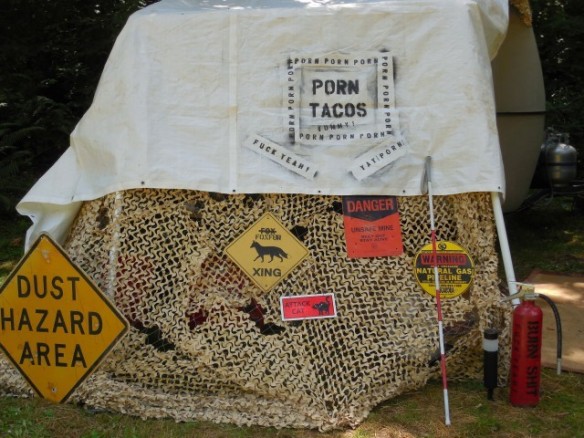
Signage is important!

Why the Porn??
It comes from a communication breakdown and bad hearing when Sweetpea (Mrs. Foxfur) yelled from the back room, “Can I have another pork taco?” but I heard Porn Taco. A legend was born.
These have been to Burning man, SOAK* (Oregon’s regional burner event), several other festy-type shindigs, and countless friend’s homes. There’s only one thing left at the end of the night, mouths wanting more. I had a near riot after running out at SOAK* last year. You might have to beat people off to make sure there’s enough porn for everyone.

porn0

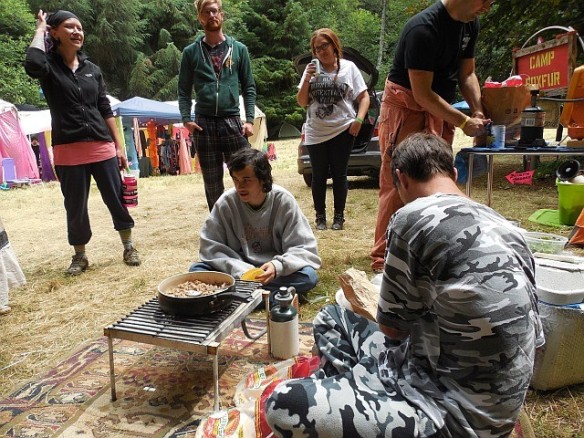
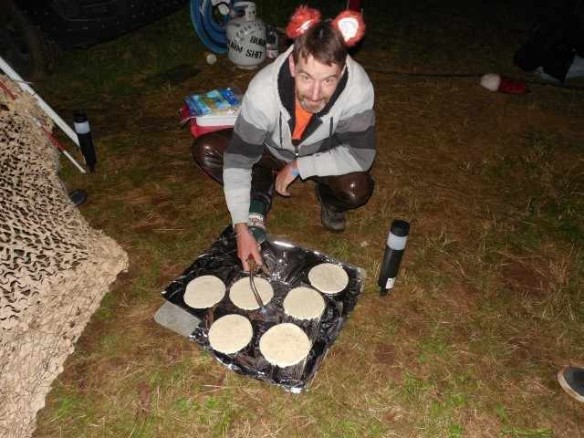
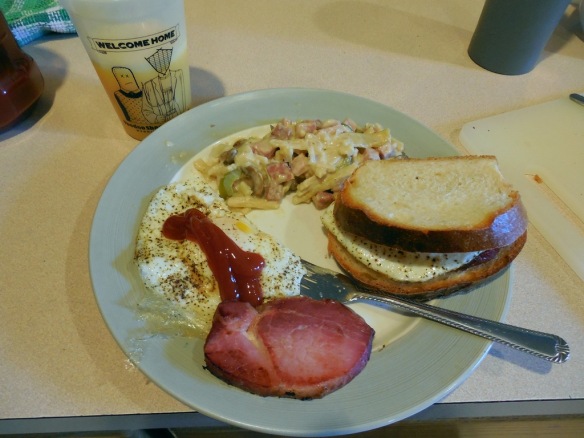
Porn Tacos Gone Wild! This was a Porn Taco breakfast which makes me wonder about the total absence of alcoholic beverages. Booze and porn, yay!

Porn Tacos

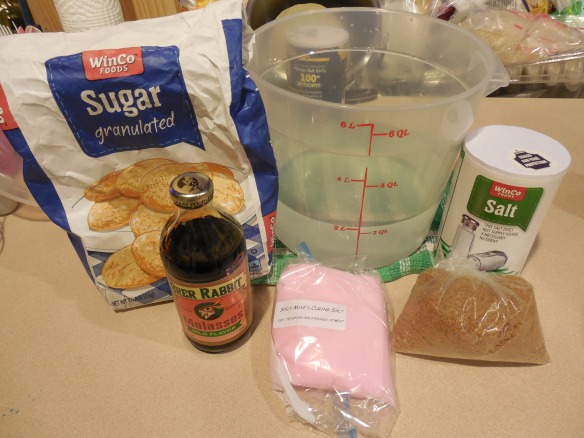
2 teaspoons cumin seeds -OR- 2 teaspoons ground
1/2 teaspoon black peppercorns -OR- 1/4 teaspoon ground
1 head (8 to 12 cloves) garlic, minced
2 teaspoons salt
1 teaspoon dried Mexican or regular oregano
2/3 cup orange juice*
1/4 cup lemon juice*
1/4 cup lime juice*
*Or use 1-1/4 cups bitter orange juice instead of the mixed  juices, it’s the real deal…
1/3 cup dry sherry
2 tablespoons oil (coconut, olive, canola)
2-3 cups water
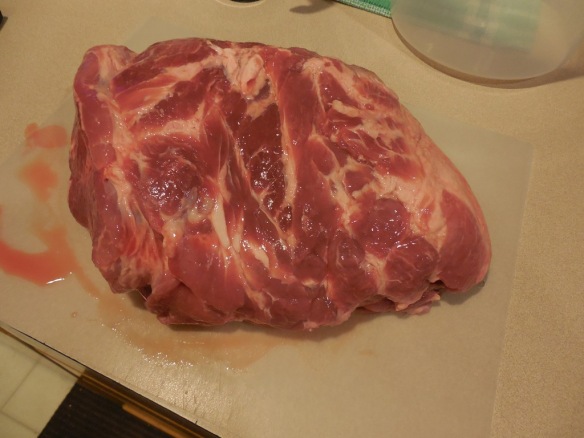
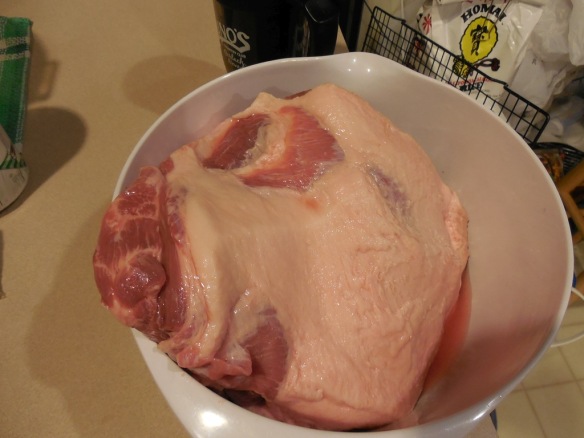
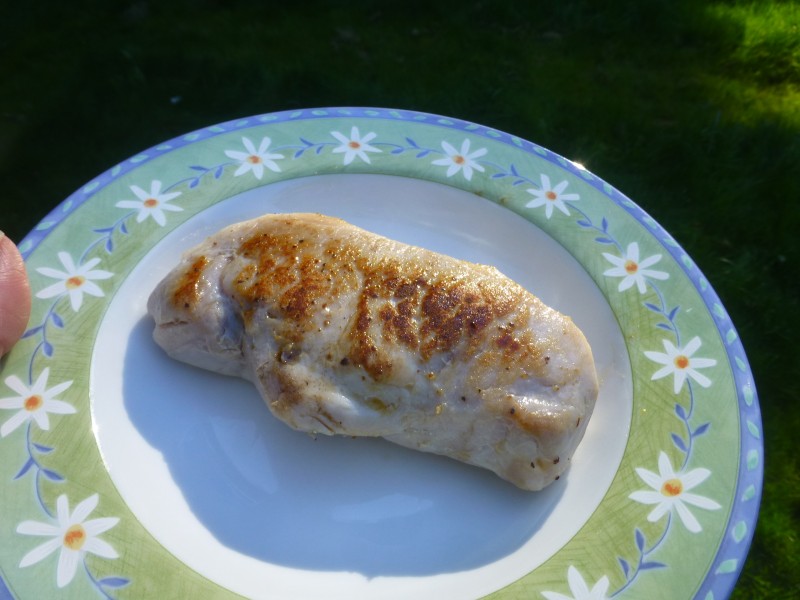
2 to 4 pounds boneless pork country style ribs
The ribs aren’t in a rack, they’re individual, ask the butcher.

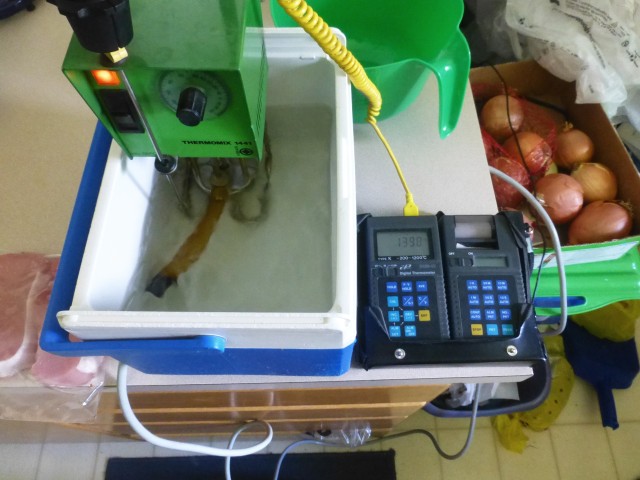
Put a small saucepan or skillet on medium heat. Add the cumin seeds and peppercorns to it then stir and shake constantly until good and smelly, about a minute or two. If it smells like a sweaty plumber, you’re there! Let cool.

Crush spices with a mortar and pestle, suribachi or your own homemade contraption.

porn3

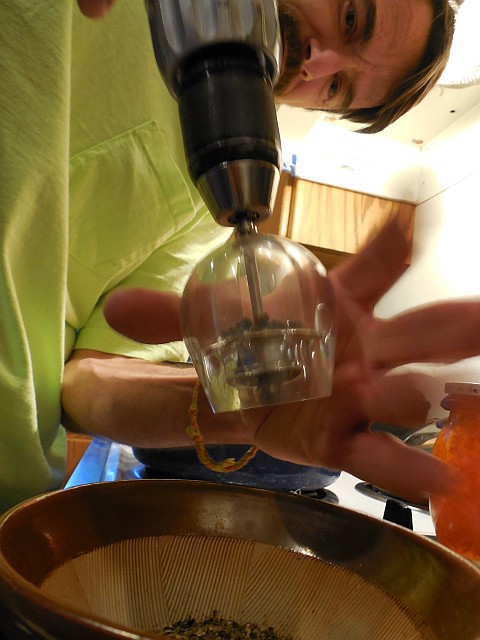
You can use pre-ground spices or toast your own and grind ’em! I tore the handle off a pepper grinder and hooked it up to my cordless drill. Fucking brilliant, right?

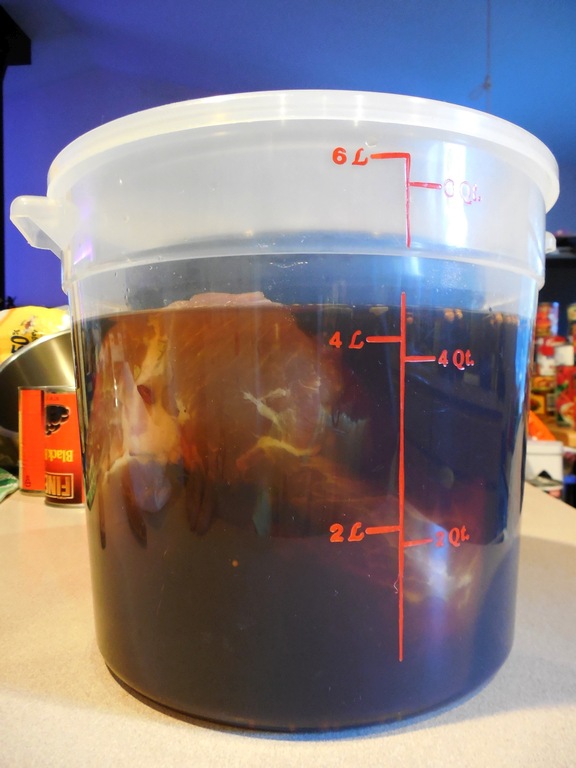
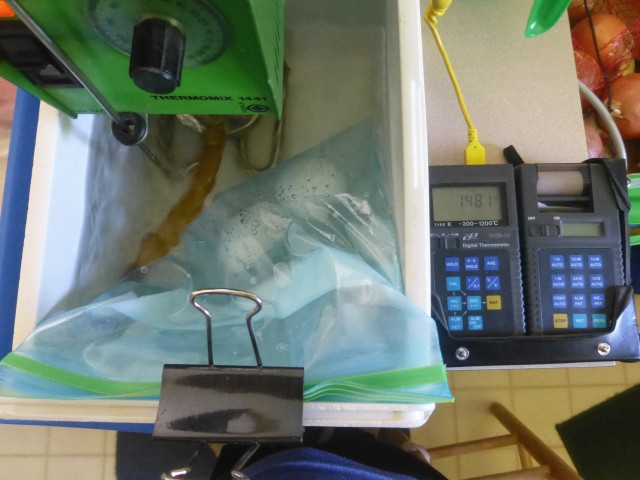
You can use a food processor but then you don’t get the exercise. If you’re using pre-ground spices, don’t bother. Toss it all into your stew pot and stir in the garlic, juice, sherry and oil and bring to a simmer. Now set the ribs in the pot. It’s OK if they’re touching and a little crammed, they’ll be comfy. Pour in 2-3 cups of water, just enough to mostly cover the ribs. I always have an inch or so above the surface, just get in there and turn the exposed ones every 10 minutes or so. I’ll toss a can of PBR or Shock Top beer in sometimes. Open it first…

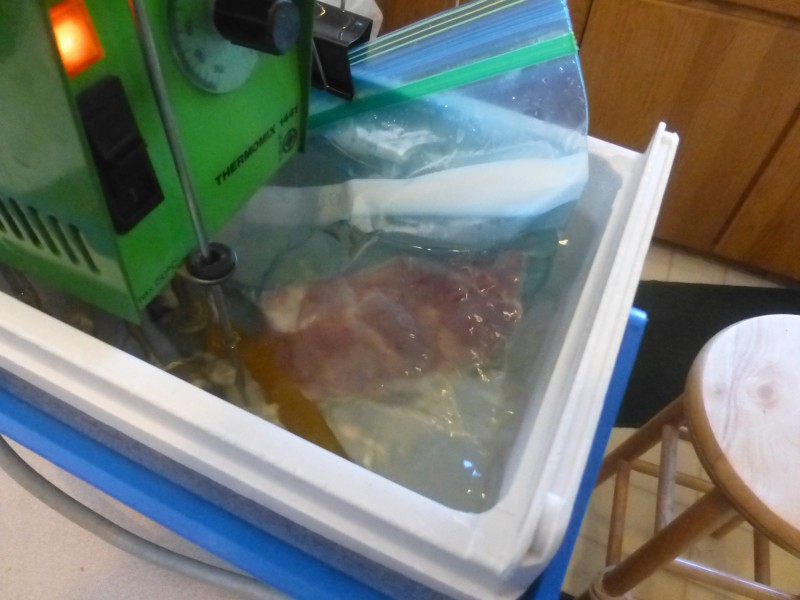
Bring back to a boil then reduce to a simmer and cover. Let the ribs go for an hour, turning every so often. Don’t worry if they fall apart, that’s what we’re doing later anyhow.
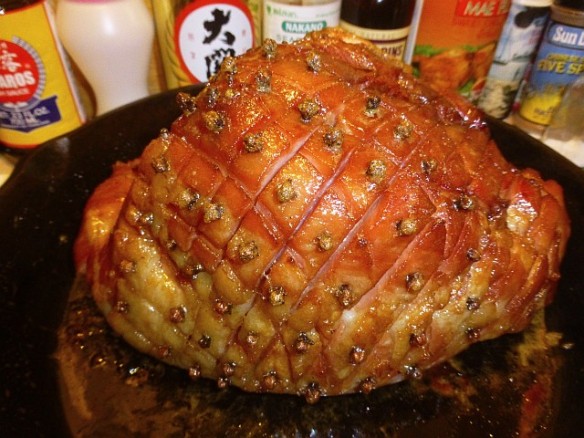
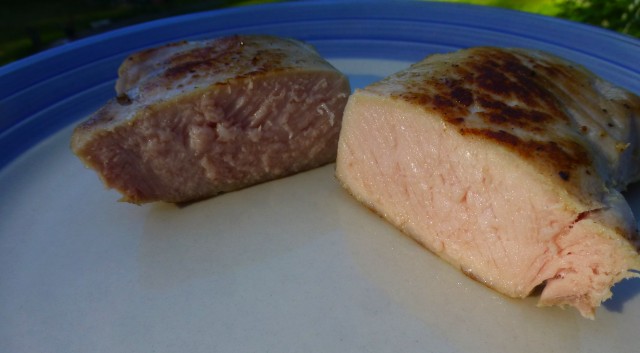
After simmering for an hour, remove the cover and cook down the liquid to a quarter or less of the original level. You’ll need to turn the heat up until it’s bubbling a bit but not close to boiling. Check and turn every 15 minutes. After 30-40 minutes start keeping a close eye on the level, it can go down pretty fast. I usually take it to the point where it’s almost a syrup, probably 1/4 cup, and the bottoms of the ribs are browned (it makes a heartier flavor) but you can stop at anytime. And don’t take the times listed for reducing the sauce as gospel. Be a helicopter chef the first time you make porn and hover around it until you see it through to the end.

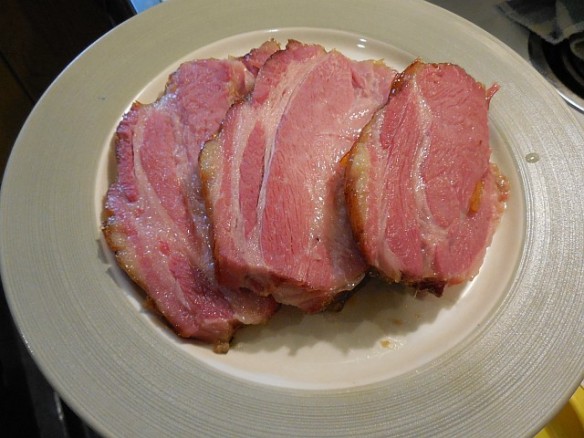
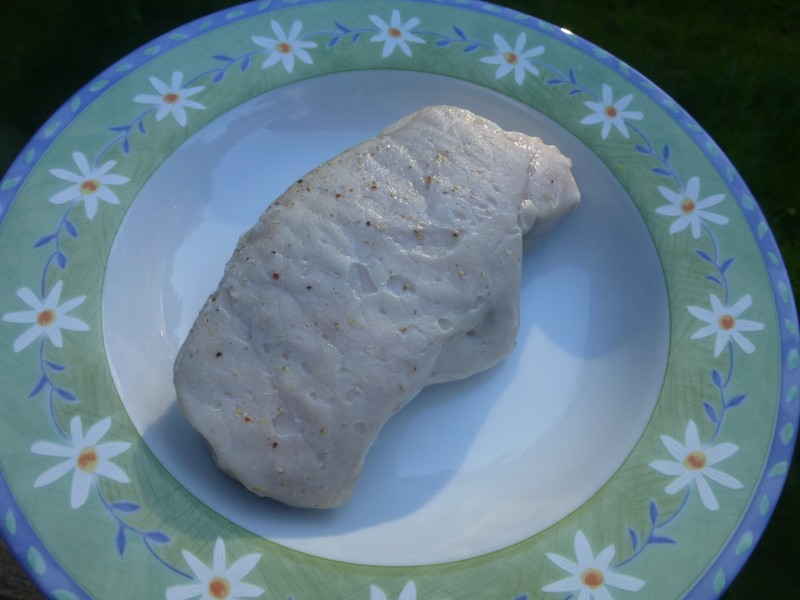
Take the ribs out and shred them with forks then mix in some or all of the reduced cooking liquid. Taste the liquid first… DAMN! pretty tart & tangy, yeah?
At this point you have to make a choice. You can serve the shredded pork over rice or you can be a boss and go for the Porn Taco option.
The authentic Porn Taco is made with flour tortillas browned with a blowtorch, then slathered with sour cream with the pork with cilantro on top. Go nuts and add some crumbled cotija cheese, chopped green olives, or whatever else you fancy.
I press ’em kinda flat and cut them in half so everybody in the crowd can get some porn in their mouths.

porn4

For best results lightly toast the tortillas with a blowtorch. They then become Torchtilla!.

porn5

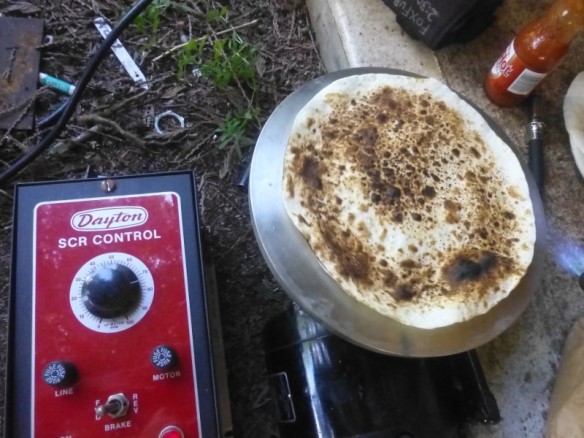
And build one of these cute li’l bastards; the variable-speed Torchtilla Turntable. Sweep the flame from center to edge a few times as it rotates. Work smart or work hard, your choice.

These are the perfect food for a potluck, tailgate party, or Tuesday night at home. People won’t soon forget them. In fact, if you bring them to a party then something else to the next party they’ll send you home to make the porn. I’m not kidding, I’ve had friends get truly upset that I hadn’t set one aside for them. And there’s never a worry about leftovers, when Porn Tacos are served everybody comes quickly…

So there you go, the only way to be a real pornstar is to make homemade Porn Tacos. I served one to a real-life porn star at Burning Man and she loved every inch of it.

***Hey vegans, you can make Porn Tofu!! Just sub cubed extra firm tofu for the meat and proceed exactly as above. Carnivores have eaten ’em and didn’t realize there was no meat in ’em, yay! Smoked tofu is even firmer than the smoke-deficient version, My dear friend Pe Low came up with that one. Her Porn Tofu beats my version paws down, no contest. Due to the firmness she was able to dice it into 1/4-inch cubes which means more surface area which allows easy penetration.

porn8

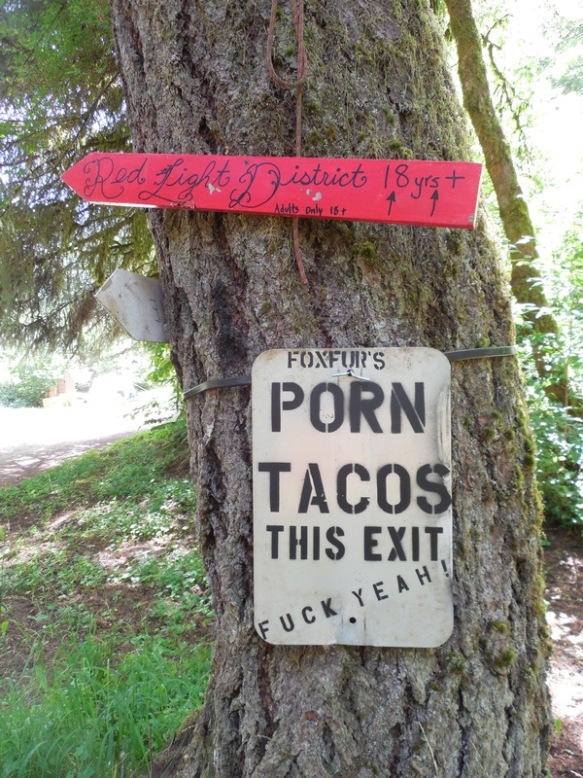
SIGNAGE people, I can’t emphasize just how important signage is.

PORN TACOS SIGN BM

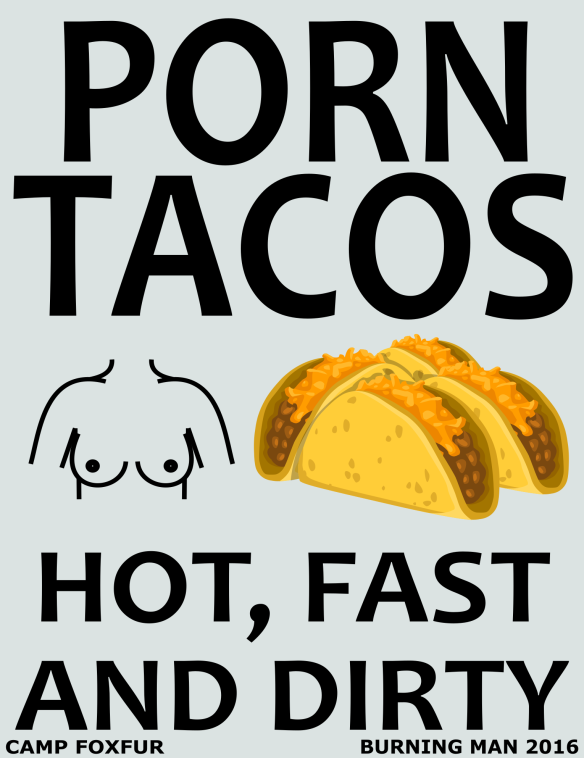
Did I mention signage? It’s scaled to 8.5×11″ so you can print one up for your next Porn Taco soiree. Then I won’t nag you about signage…


You might be looking down here for the asterisk to see why it was next to SOAK. That’s just how it’s spelled, SOAK*. It’s a play on the “Burn” in Burning Man, because it’s a Burning Man regional event and it rains 482 days a the year up here in Oregon. Learn more about it HERE.

What’s a Burning Man regional? It’s much less expensive and much closer to you, like in your state, and has a very similar vibe to The Burn; art, fire, theme camps, bars, etc. For those not able to go to the big event, regionals allow them to experience the magic. A full list of regional events held yearly around the world can be found HERE. From Shanghai, China to the United Arab Emirates to Russia and beyond, there’s one near you.

PORN TACOS CITIES NUTS 9UP

One more for gender equality!

Hot Damn, Home Cured Ham!


ham01

This is all you need (molasses optional). The sugar is turbinado or some such expensive fancypants stuff. Plain white sugar is all I use now. The pink stuff is the curing salt.


Can you stir sugar into a cup of coffee?
Can you leave something be in the fridge?
Can you close your eyes and touch your nose?
If you answered yes to either of the top two questions then you can cure your own ham.
If you answered in the negative on the third then you’re drunk, but, the good news is that you can cure a ham with only one eye open.

Ham’s always been a favorite of mine. I don’t remember my first bite of ham but I’ll bet I got the finger of the fool feeding it to me. This is the recipe that will change your life. Ham seems a mystery to most but if you have a two pound hunk of pork then you’re well on your way to your first ham. How? Stir a few powders and spices into a couple quarts of water, set the meat to swimmin’ for a few days then it’s ‘this little piggy comes home’ time.

Will you save money by curing your own ham? I can honestly say no. And yes.
No, you’ll not save money if you’re comparing the price against consumer-grade chopped and formed ‘ham and water product’ hams. Yeah, I actually saw that label on a “ham” at the market. 12% water content, said water costs you about three bucks a pound. Do the math, Bucky, that’s $24 a pound. That’s why we use gasoline in our cars and not ham juice. But when you consider quality and provenance then YES, you are saving money. You will not find ham of this quality at any price. This is premium ham. You choose the cut, you choose the amount of spices and seasonings and you choose the kind of smoke (or choose not). And you know exactly where it came from and what’s in it. Commercial hams bob cheek by jowl in giant impersonal stainless steel troughs in an industrial fluid of unknown composition. It’s like a swimming pool for pigs, a real crowded one. The little hams we’ll be making here will be no more than two or three at a time, more like a hot tub for hams.

It’s time to cut the gabbing and make us some ham! The ingredients are simple and I ain’t gonna be telling you to use all kinds of pretentious bullshit like hand-rubbed sea salt and high altitude sugar from the hinterlands of Peru. Use whatever salt you like or have on hand. Iodized is just fine. I’ve used it without incident. I like to use kosher salt myself but you can go with any kind of salt you like. Ditto for the rest of everything.
Do it like this:

Your Own Damn Ham

2 quarts of water
3/4 cup of salt
1 cup of sugar
1 Tbsp of curing salts (cure #1, not #2)
1/4 cup brown sugar
-OPTIONAL-
1/4 cup of molasses
1 tsp ground ginger
1 tsp ground cumin
7 to 10 whole cloves

WTF are curing salts? They’re a blend of sodium nitrite and sea salt and it’s bright pink. You can find it on eBay, we buy it two pounds at a time and it’s cheap. Ten bucks worth will keep you in ham for a year or two. Be sure not to get #2 curing salts. That’s sodium nitrate and is made for dry curing meats like salami.
And don’t worry about nitrites and health. You get more nitrites from a serving of celery than a serving of bacon. That’s why they use celery juice in so called “uncured” bacon. Guess what, folks, you’ve been buying cured bacon and paying extra for a fiction.
Got a 2-gallon bucket? Find one at a hardware store or hit up a restaurant supply place in your town for an NSF certified 2-gallon bucket.

Directions:
Stir everything together in the bucket.
Place your pork shoulder, sirloin roast, tenderloin, or other cut(s) of pork into the brine.
Put it in the fridge.
Rearrange the hams once a day so the parts up against the bucket face the other way. We’re trying to get all the surfaces exposed over the next few days.
After five days, pull ’em out! If you want a strong ham flavor then go to the next step. If you want it a bit less salty then fill the bucket with fresh water and let ’em sit in the fridge for an extra day.

Now let’s cook it!
We’ve got a choice, smoked or not smoked.
If you don’t have a smoker it’s no problem, my first few weren’t smoked and I even rubbed liquid smoke on one and it was just fine.
For those of you without a smoker: rinse the ham then dry it with a towel. Wrap the ham in two layers of aluminum foil. You want it as sealed as possible but not touching the top else the juices will squirt out of the foil. It’ll keep it moister PLUS you get all the ham juice that cooks out. More on that later.
Put it in a 225F oven and go do something else for 2-1/2 to 3 hours or whatever it takes to bring it to 165F inside the thickest part.
I’ve let mine go for 12 hours at 200f and I’d swear it was a country ham, firm and dryer than your run of the mill ham.
Next, eat it. You’re done.

I only have a cold smoker, a Big Chief front-loader donated to FoxfurAmused by a reader, but it gives ham a smoked flavor indistinguishable from a hot-smoked ham. I put it in and smoke it with 2 pans of alder or applewood. Use whatever tickles your tastebuds. After cold smoking pop the ham into the oven following the directions above.
You can make a cold smoker using nothing more than a soup can full of smoker wood chips with a soldering iron shoved into it and covered with a cardboard box.
If you have a hot smoker then you already know how to cook a ham. Go to smokingmeatforums.com for tips if you don’t.

Now get on eBay or Amazon and order up some cure #1 curing salts and a bucket and make some ham! It’s even easier than it seems.

A few last things.
Seasonings, use ’em! I typically use cumin, ground dried ginger and cloves. The last one I made had rosemary, coriander, and maple syrup, fu*king fantastic! There’s two curing in the fridge as we speak swimming around with star anise, cloves, and dried allspice berries, crushed. I suppose you could use fresh ginger but I prefer the stronger flavor of the dried stuff and I think you will too. You can use pickling spice like a boiled ham or use none at all and taste a naked ham.

Ham Juice! The juices that cook out will be sealed up in the foil. DO NOT waste the juice! Make up a batch of split pea soup (recipe on this blog, just use the search) and substitute part of the water with it. Then make up a pan of my simple cornbread (it’s on my blog as well) and shove it all into your mouth at once.

This is simple, folks! If there’s something you lack besides curing salts, make it up as you go along. So long as it’s cured with the salts and cooked, you’re just fine.
Get creative with it and please do post your results in the comments, you might just give me a new idea.

ham02

This is a 6lb shoulder I think. I just look for the sexiest piece of pork, one that has a bit of fat but you can go as lean as you like. Fat makes a moister ham with a mouthfeel like no other. Go ahead and do a tiny ham your first time, a 2-3lb roast works great!

ham03

Porky getting ready to swim…

ham04

Splashdown!

ham05

It’s like an aquarium for meat!

6lb roast ham done

Yeah, you can do this!

bigass ham slices

Ham fat is the best fat known. These marbled pieces went on some homemade french bread with alder smoked aged Tillamook extra sharp cheddar and some Beaver honey mustard.

ham06

Mouth-ready meat.

The Perfect Pork Chop: Sous Vide


For years I have been reading about this fancypants sous vide cooking and the hyperbole about the resulting end product.
Phrases such as “The juiciest steak ever”, “The meat falls of the bone in a stiff breeze”, and “The closest thing to a sexual experience involving a knife and fork”.
The last quote was spoken by me to Sweetpea after taking a bite of perfectly cooked pork chop. I love a medium-rare pork chop though I’ve never been able to get but a medium-rare nugget in the center of the chop through any cooking method I’ve employed. With sous vide, the entire chop is medium-rare, side to side, top to bottom.

Sous vide means “under vaccum”. I have a vaccum sealer but chose not to use it in favor of Ziploc freezer bags and expelling the air by hand. The food is cooked at a very precise low temperature and takes many times longer than any cooking method I’ve yet tried. If you want a steak cooked rare, let it go for 2 hours at 131 degrees F. Want some amazng short ribs? 141 F for 2-3 days. Sounds wrong but it is safe and tastes so right.

Yesterday morning I got up and surfed around to see what I would make for dinner. I stumbled on an intro to sous vide cooking. Upon seeing the equipment I realized that I already had all the necessary equipment and was ready to go. I really lucked out as I had a laboratory immersion circulating heater from my days in bio-lab work. I also had a digital thermocouple thermometer and stainless probe. And finally, I had a 6-pack beer cooler. I added a lab ring stand base to clamp and hang the heater at the perfect position in the cooler. A test run showed that I could keep the temperature within 0.1F of my desired temperature! It was the perfect storm, from zero to a sous vide system in less than 30 minutes.

I was fortunate to have brought the circulating heater home from the lab many years ago. It turns out it is the method preferred by fancypants chefs and is the most accurate way of maintaining the correct temperatures. They’ll put you out $800 – $1,500 for a new one, $200 – $600 for a used one (eBay, LabX). Mine was being tossed by a research group that was moving to another university. Thank you wasteful scientists!

Image

For a basic primer on sous vide cooking see this.

Want to hack your own system using just a cooler and a combo of hot and boiling water? See this. It’s a great way to experience sous vide and decide if you want to take the plunge into the deep end of the gourmet pool and never come up.

If you’re a handy bugger you can make your own circulating heated bath for about $75 by following these instructions.

Enough with the tech, let’s move on to the food.

I started with boiling two eggs. I had read that the best boiled eggs in the world are only 60 minutes away and this was absolutely correct. I put the eggs in a Ziploc bag with about a cup of water and squeezed the air out.

Image

I then dropped the bag into the water bath at 148 degF and let them go for around 70 minutes.

Image

The eggs came out spectacular. I gently thumped them and poured them into a dish. Just like a poached egg but better. They weren’t raw, as a matter of fact they are fully pasteurized by this cooking method. The yolks were unbelievable; a silky, custard texture with the mouthfeel of, well, I’ve never had something so sexy in my mouth and been allowed to swallow it before. Yeah, that good. I don’t know any other way to cook an egg like this. It was perfect.

Image

The picture ain’t great but the egg sure as hell was.

After such a stellar success I decided it was time to grab my meat and get busy. I had a pork loin chop that was making dining room eyes at me all week. I decided to brine it in a salt & sugar brine for an hour. I put 2 Tbsp of salt and 1 Tbsp sugar in 2 cups of water and called it good. I suppose you could brine it overnight but my results were so good that I doubt I’ll try it.

I took the chop from the brine and patted it dry with some doubled paper towels. I then sprinkled it with salt, pepper, and garlic powder, that’s all. Into the Ziploc freezer bag it went. I dropped it in the bath at 141 degrees and let it go for 2 hours.

Image

After 2 hours it looked like this:

Image

Not very appetizing, is it? That’s why a quick pan searing or grilling is necessary. I heated my cast iron skillet to 5,000 degrees (actually, whatever the temp is on a medium electric burner) until I could smell the metal, slopped a spoonful of peanut oil into it, and slapped the chop down for 1 minute per side. This gives the outside that smoky and browned crust that we all adore.

Image

When I cut it open I was greeted by a happy light pink color, the color that I’ve always wanted a chop to be, and it had that color through and through (except for a few millimeters on the sides I seared).
The chop was bursting with juices, the moistest chop ever! The texture was quite unlike anything I’ve ever had. It’s like eating a pork chop with the texture of a filet mignon or prime rib. I cannot adequately describe it.

Image

Go ahead, make your own beer cooler / hot water sous vide cooker and try this out. You will not regret it.

Foxfur’s Savory Sesame Chicken


Eat me.

Eat me.

OK, I’ll admit it, I like Americanized Chinese food. I love authentic Chinese food but with just a touch of sweetness. Not a jawbone ringing sweetness, just a touch. It doesn’t necessarily have to balance the dish, unless it’s supposed to. A simple wave from the wings will do me just fine most of the time. This is not one of those times.
Another admission; I *LOVE* Safeway’s sesame chicken. There, I said it. I love, above all others, the most white bread American supermarket on the continent’s (no matter what they decorate it like) deli sesame chicken. This is why I developed this recipe. I’m far too proud to ask an establishment for their secrets. Although many will provide them upon request, I’d much rather develop a recipe by making it four or five times and perfecting it with every revision. This applies to nearly all recipes you will see right here in Foxfurville. If you loosely follow my recipes I can guarantee arrival at the fifth plateau of NOM!

Safeway’s sesame chicken is characterized by its sticky and sweet coating of yummy sauce and whole sesame seeds. It is pretty damned close to “Oh hell, I’d better book a visit to the dentist” sweet. I can’t eat it on a regular basis, nor would I want to, but as an occasional treat it’s a kick in the pants free-for-all that fits rather nicely in your mouth.

What I ended up developing is a more savory version; a perfect balance of sweet and salty with a savory edge that will bring tears of joy cascading forth from your salivary glands. Just see if it don’t!
BTW, you won’t find cilantro in Safeway’s version. This was suggested by Sweetpea and is key in sending the dish into low earth orbit.

I recently scored a deep fryer. Holy cow, folks! It’s now my favorite implement of culinary devastation in the continuing war against empty tummies. I limit its use to once or twice a week, three when developing new weapons of mass deliciousness. If you don’t have one you can use a wok, dutch oven, or big rig hubcap (automobile hubcaps are too shallow).

Foxfur’s Savory Sesame Chicken

1 Pound boneless / skinless chicken breasts (2 large or 3 small)
1/4 C pineapple (tidbits are the only way to go)
Chopped cilantro
Oil for frying

For the marinade / batter:
9 TBSP Cornstarch (1/2 C + 1 TBSP)
6 TBSP Water
2 TBSP Sesame seeds
1 TBSP Ground sesame seeds (methods below)
1/2 tsp Salt
1 tsp Soy sauce
1 tsp Sesame oil

For the sauce:
1 C Sugar
1 C Water
3 TBSP White vinegar
2 TBSP Worcestershire sauce

There are many ways to grind sesame seeds. I have a suribachi (Japanese mortar & pestle) but rarely use it for the seeds unless I’m incorporating other stuff in with them. I also have a Japanese handheld grinder / dispenser but it doesn’t give the mashy, pasty texture that I like for this recipe. For this I use one of two field expedient Macguyver methods. The first is with two spoons. Put a small amount of seeds in a spoon and mash with another spoon. Simple.
The one that I prefer is to use a small stainless steel measuring cup (mine is a 1/8 C) and the end of the handle of an old Eklund bottle opener. It’s a good old fashioned maple handled dinosaur from the 1950’s that I inherited from my grandmother. Drop the seeds in the cup and beat and grind the hell out of them.

Blah blah blah, let’s get cookin’…
Mix up the marinade / batter and set bu your cutting board.
Dismember the chicken into 1/2 to 3/4 inch chunks and toss them in the marinade. Let the chicken rest in the goo until they coo with relaxed little clucks, about 30 minutes.
While they’re relaxing, mix up the sauce. Set aside.

Heat your oil to 350 – 360 deg F.
Use a thermometer or chopstick (will bubble at the tip when at proper temp) to know when you get there.

Using a fork, stab the chicken one piece at a time and drop in from as low an altitude as possible. No Bellyflops! You’ll want to do this in batches of  7 – 9 pieces. Don’t crowd the pond, chickens aren’t social swimmers.
Fry until a straw or golden brown color. Cut open a piece from the first batch. Pink means it’s medium rare, not good. Throw her back in the pool for another minute.

I drain mine using two paper towels atop a brown paper grocery sack. transfer to a paper plate lined with paper towels between batches. Drop chicken in oil, remove to towel / bag, drop in more chicken, move drained chunks to plate.

Once all the chickens have had their turn, heat up a frying pan or skillet on medium-high heat. Dump the chicken into the pan and heat, stirring and shaking every 10 – 15 seconds until they’re good and hot. Turn down to medium. Now pour in about 2 TBSP of the sauce. Stir around to coat the pieces and let it cook down to a sticky goop. Don’t let it burn. Now shake in 2 more TBSP of sesame seeds. When it gets goopy go ahead and dump another 2 TBSP in and do the same. You can actually do this with all of the sauce and end up with chunks so sticky that they’ll stick upside down to the range hood. I’ve done this and Foxfur was amused. I’ll pour and goop 2 – 3 times otherwise it gets too sticky.

Dump in the drained pineapple, cook for about 30 seconds, then flood with the remaining sauce. Cook down a bit until it reaches your ideal thickness or add a bit of cornstarch water to thicken it up.

Serve over rice, sprinkle with cilantro and enjoy!

Have some toothpicks on hand…
This stuff is finger lickin’, molar stickin’ good.

Maple Bacon Bourbon Tabasco Cashew Pecan Pie


Maple Bacon Bourbon Tabasco Cashew Pecan Pie

When somebody mentions pie, two things come to mind; pecan pie and my mouth.
When somebody says such and such is as American as apple pie, I snicker and mock their prudish pedestrian profession. Pie, man, PIE is made for pecans and pecans is made for pie.
Until recently I have procured my pecan pies from retail establishments. I’d never investigated the possibility of creating my very own. I thought I needed a third degree black belt in pie-fu to manifest such a delight. All these years of scoring my fix from pie slingers while I could have been growing my own…

As you might know, I am never satisfied with “normal” recipes and will not accept rote recipes without lifting my leg and decorating them with my own touch. This recipe is no different in that respect. In fact, I may have gone a bit overboard! You need not add everything that the title suggests. It is a superwhamified version of Karo’s classic pecan pie recipe.

For classic pecan pie:

1 cup Light OR dark corn syrup
3 eggs
1 cup sugar
2 tablespoons butter, melted
1 teaspoon vanilla extract
1-1/2 cups pecans
1 (9-inch) unbaked or frozen** deep-dish pie crust

Directions as cut n pasted right from Karo:
Preheat oven to 350°F.

Mix corn syrup, eggs, sugar, butter and vanilla using a spoon. Stir in pecans. Pour filling into pie crust.

Bake on center rack of oven for 60 minutes. Cool for 2 hours on wire rack before serving.

**To use prepared frozen pie crust: Place cookie sheet in oven and preheat oven as directed. Pour filling into frozen crust and bake on preheated cookie sheet.

Yawn. I mean it’s good but nowhere as good as the super exciting version below. The Tabasco sauce in it does not make it hot and spicy. If anything it gives it a mild fruity flavor. Add more if you want it to be hot.

For the Maple Bacon Bourbon Tabasco Cashew Pecan Pie:

1/2 C Light OR dark corn syrup
1/2 C Maple syrup (Grade B is preferred but Grade A is acceptable) 3 eggs
1 C sugar
2 TBSP butter, melted
1 tsp vanilla extract
3/4 C pecans
3/4 C Cashew halves or pieces (pieces distribute better)
2 Pieces crispy fried bacon, finely crumbled
1 TBSP Burbon or whisky
1/4 tsp Tabasco sauce (this is non-negotiable, Tabasco only!) 1 (9-inch) unbaked or frozen** deep-dish pie crust

I snip my bacon across the slice into 1/8 inch matchsticks using scissors.
I also toast the pecans in a small pan over medium-high heat, flipping or stirring frequently. Don’t go for browning, just go until they’re good and hot, hotter than your tongue would accept.

Preheat oven to 350°F.

Mix corn syrup, maple syrup, eggs, sugar, butter, vanilla, bourbon, and Tabasco sauce using a spoon. Stir in pecans and cashews. Pour filling into pie crust.

Bake on center rack of oven for 60 minutes. Cool for 2 hours on wire rack before serving.

**To use prepared frozen pie crust: Place cookie sheet in oven and preheat oven as directed. Pour filling into frozen crust and bake on preheated cookie sheet.

You can leave out the maple syrup in favor of all corn syrup (makes a firmer pie). You can leave out any other ingredients that make you feel icky. I prefer the bacon cashew Tabasco version but I just had to develop an over the top version in order to keep my WTF credentials current.

If you want a firmer, chewier pie, use a non deep-dish frozen pie crust, I like Pet-Ritz brand. You’ll have a half cup of pie goo left over. Feed it to the ants…
This is the type of pie you can eat with your hands without goo running all over them. Perfect for pies-on-the-go.

Whichever version you end up making, you will be amazed at just how simple it is to make your very own Pie Of The Gods.

Crab Stuffed Pork Loin Chops With Red Wine & Shallot Reduction Sauce


This is a long one but features a happy ending. No, really!

I was sitting around one night and wondering what kind of fancy-schmancy recipe I could crank out using a quick scavenger hunt through my depleted kitchen. I had some boneless pork chops, big ol’ thick and meaty ones, and wondered what to do with them. I’d always wanted to stuff a pork chop but never seemed to get around to it.
I’m also a lover of the lowbrow and much maligned canned crab so I decided to go with it.
Hmm, what else could I stuff in there? I had a quarter pound of monster crimini mushrooms, some onions, a lonely egg, and a nearly empty bag of panko bread crumbs languishing atop the fridge.
I also had a half bottle of Cabernet (from my burner friend Felony Arson) hiding in the back of the fridge which I thought would make a yummy red wine reduction to slop on top of the chop.

If you are going to make the reduction sauce, be sure to prep the ingredients when prepping the chop ingredients or at least before you put the meat in the oven.

Butterflying (I’ll be damned if that word don’t look totally wrong and it just plain stumped the spellchecker) a pork chop is a shiny way of saying “I almost cut it in half but got distracted at the last moment”.
Drop your chop on the cutting board, plump it up by slapping the sides inwards but not so much as to overdo it. Yeah, crystal clear, huh? Then, using a really sharp knife, start sawing at it in a horizontal direction bisecting it at the equatorial center. Heh. Keep going until you get to the last 1/4 inch and quit. I like a chop that has a strip of fat on one edge. Use this as the back or spine of your lepidopterous meaty treat. Now open up the chop like a book. Kinda looks like a butterfly but porkier, huh? Feel free to add color spots with food dye or whatever. I don’t but probably should.
Flip it over so the spine faces upward and pat it down pretty flat. Cover it with a piece of plastic wrap that’s about twice as big as the meat. Get out a meat mallet (or a rubber body & fender mallet or even a chunk of 2×4 lumber) and beat the shit out the chop until each meat flap is about half its starting thickness. Beat it from the center of each flap and work outwards.

Crab Stuffed Pork Chops

2 pork loin pork chops, 1 inch thick and butterflied
1 6 oz can crab meat – well drained
1 egg, beaten
1/3 cup bread crumbs (panko RAWKS!)
1 TBSP fish sauce or soy sauce
1/2 tsp sesame oil
1/2 tsp salt
1 half of a medium onion – finely minced
5 minced mushrooms

Butterfly the chops, cover with plastic wrap and pound out to half the original thickness.

Combine crab, bread crumbs, egg, fish or soy sauce, sesame oil and salt in a medium bowl, set aside.

Saute onion and mushrooms with just enough butter to lightly coat. Add a small amount to begin and add more sparingly. Saute until the mushrooms are somewhat soft.

Add the mushroom mixture to the crab mixture and stir it up. You might need to drain a bit of juice from it. I dumped mine into a fine colander lined with two paper towels and pressed it over the sink.

Open the chops and mound up some stuffing on one side.

Fold them up all tacolike and put on a greased greased baking sheet.

Preheat oven to 350 degrees. When ready, cook for 45 – 50 minutes.

Here’s the sauce for the top. It’s optional and sort of, but not totally, a pain in the ass to make but is soooo worth it.

Red wine & Shallot Reduction Sauce

1/4 LB Shallots sliced shallots (4 – 5 average size shallots) 3 TBSP Olive or peanut oil
1 Garlic clove, minced
1/2 – 1 tsp Rosemary
1/4 – 1/2 tsp Black pepper
5 tbsp Balsamic vinegar
2 Cups Red wine
2 Cups Beef stock or chicken stock – bullion granules work great 1 TBSP Salted butter

Wine. NEVER use cooking wine. Cooking wine is made of evil. It is not your friend. Do not turn your back on it. Ever.
The secret to cooking with wine is to only use what you would drink. If you wouldn’t put it in your winehole, why would you put it in your foodhole?

Saute the shallots in a medium saucepan in the oil on high for about 3 minutes until very lightly browned, keep it moving so you don’t burn them. If you don’t keep them constantly moving then they’ll end up deep-fried. You want them to remain quite wiggly and squiggly. Add the black pepper, garlic, and rosemary. Keep cooking another 2 – 3 minutes and stir continuously.

Add the vinegar and keep stirring until you’re left with a syrup.
CAUTION! Do not hold your face over the saucepan or sniff it while reducing the vinegar. You have a mighty potent homemade crowd control agent stewing in there!

Add the wine and reduce by two thirds. This might take 10 minutes or maybe a bit more.

Add the stock and return to a boil. Reduce this by two-thirds to arrive at around 1 1/4 – 1 1/2 cups. It will be a thick, chunky sauce and not too runny.
The shallots will make up the bulk of the sauce and have little free liquid left. Add a pinch of salt if needed but the stock should be adequate. Stir in the butter and you’re done!

You can serve this immediately or set aside and reheat when ready to serve. It is also fantastic when cooled to room temperature.

As the picture shows, I sliced up a large crimini mushroom and sauteed it in butter. I laid a few of these slices over the top before spooning sauce over the chop. Don’t be lazy, just do it. I guarantee this will get you laid… See? There’s your happy ending.

Cooking With Foxfur: Hot & Sour Soup


Can you run a knife? Drive a stove? Hang onto a spoon? Yeah? Well then, kitten, you can make a mighty mean pot of hot and sour. In terms of ease it’s the split pea soup of China. Easy prep, easy cook, and you’d have to really apply yourself to screw it up.

Don’t let the hot part scare you off. It’s not hot in the conventional sense. The “hot” comes from white pepper which is identical to black pepper but for one detail. Peppercorns for black pepper are harvested from the tree when nearly ripe and allowed to dry in the sun so that the outer skin, the pericarp, oxidizes and turns black. That’s what gives the black pepper its black. White pepper is made from peppercorns that have been dried and then lovingly rubbed by silky handed virgins to remove the pericarp. White pepper still tastes very similar to the black but seems, to my palate, a bit more refined. Think of it as perfectly pampered pepper. It’s used extensively in Asian cuisine because it won’t feng your shui.

This is a dish that will convince guests and loved ones that you are a closet chef. Of its many pluses, the plussiest plus is that you can make it using ingredients that have a decent shelf life and won’t require a special trip to market right before making it. A block of tofu, a can of bamboo shoots, a can of shiitake mushrooms are the most exotic ingredients required.

Hot & Sour Soup

2 Quarts (8 Cups) chicken broth (I use powdered granules)
1/2 Cup soy sauce
1/2 Cup white vinegar
1/2 Teaspoon white pepper
1 Pound firm tofu cut into 1/2 inch cubes
1 Can bamboo shoots
1 Can shiitake mushrooms (or 4-6 dried, soaked in warm water for 30 minutes) 3 Well beaten eggs
2 Tablespoons cornstarch mixed with 2 Tablespoons cold water

Put the broth on the stove and set it to medium for a slow simmer. Add the soy sauce, vinegar, and black pepper.
Dump the tofu in and and stir it up real good.
Cut the mushrooms into thin strips, about 1/8 inch wide, the size of matchsticks and toss ’em in the pot. Cutting the canned variety is like slicing jellyfish, careful!
Slice the bamboo shoots into 3 or 4 matchsticks from each flat slice as they come from the can. Heave ho, into the pot they go.
Increase the heat up to medium-high. Pour the cornstarch water in and stir to distribute. This will thicken the soup almost imperceptibly but your tongue will notice the slight velvety texture. Just see if it doesn’t…
Now crank up the burner to sorta not quite high to get a good almost boil going on.
Stir the pot so you get a good cyclone going and pour the eggs in a stream over 5 to 6 seconds. Stir a bit more to incorporate the eggy goodness.

Serve some up in a bowl and drizzle in a li’l bit of sesame or chili oil if that kinda thing pleases you.

Wanna get all fancylike with it? Throw in some crispy fried pork matchsticks, slivers of bamboo shoots, grated carrot or daikon, gold leaf, etc.

Survey says? You’re a genius!
After eating, I leave the pot on the stove top overnight. The flavors magically mingle and and magnify when you’re not looking. It’s a great breakfast on a cool winter morning.

The perfect accompaniment to hot & sour soup is crab Rangoons, A.K.A. crab puffs. I will publish that recipe soon…

Thanksgiving Day Facts


I am constantly amazed by the ignorance and gullibility I see displayed by the general public. It dissapoints me to know that so many otherwise mediocre citizens of the world get most of their facts from Facebook and The Onion and never stop to critically examine them for truthiness. Therefore, as a public service, I offer to you these little known facts about the American institution of Thanksgiving Day.

The roots of Thanksgiving Day
The most common misconception about our day of thankiness is that it is based on the providence of Indians. Nothing could be further from the truth. Were this to be true then we most certainly would be sitting down to a meal of tandoori chicken, curried lentils, yogurt, and naan bread. It is a generally accepted fact that people from India did not come to America until long after the original settlers.

The origins of turkeys: Past and present
While the first turkeys *may* have been provided to settlers by Native Americans, the turkeys that we eat in modern times are products of Santa’s rage. So great is his boundless fury and his monomaniacal campaign to rule the holiday season that it whips the old man into a killing frenzy each fall. Early in September, typically in a drunken stupor, though there are rumors that the Jolly One now has an addiction to bath salts (google it), Santa mounts his sleigh of doom and zips around our great nation mercilessly slaying the fat and dumb flightless birds that have come to symbolize our day of greatfulishiness.

Spam
Let me be perfectly clear about this: Turkey Spam is an abomination. As much as I love Spam (see my post, I Am Spam) I will not suffer Turkey Spam. It should be illegal.

The glaring absence of Thanksgiving Day in foreign countries
The reason is simple: Foreigners are unamerican. A thankless and ungrateful lot they are which is astonishing in light of their gorging themselves on our foreign aid dollars and really neato weapons. As further proof of their lack of patriotism I submit the fact that they do not participate in our Fourth of July (otherwise known as Independence Day) festivities. This shortcoming is made all the more baffling by their dependence upon government subsidized pensions and overabundance of paid holidays.

Why Native Americans do not celebrate Thanksgiving Day
Would you be thankful for government cheese, lard, and flour? I didn’t think so.

The turkey and touching of ones junk
Turkey contains large amounts of the organic tranquilizer tryptophan which is largely responsible for post-dinner stupor and slumber. Nowadays most turkeys are fed hormones. These hormones are fed to them in order to promote not growth but randiness. These hormones, once eaten by human males, combined with copious amounts of likker are likely the reason that men’s hands often wander south of the belt line while sleeping off dinner. As yet this is only a causal connection. I have submitted several grant proposals to our nation’s scientific institutes to fund applied research in this area.

The eating of the mascot
Thanksgiving is the only holiday in which the eating of the mascot is practiced. Do we eat black cats for Halloween? Do we eat rabbits for Easter? Do we eat parents on Mothers / Fathers Day? No. No we do not. Although a roast leg of Santa would more than likely be a delicious, albeit high fat, treat, we do not eat grumpy old men for Christmas.

Eating of our national symbol?
The turkey, as proposed by Benjamin Franklin, was almost selected as the representative symbol of our great nation. Can you imagine Santa trying to slay bald eagles to grace our tables with? With their amazing powers of flight, not to mention possession of stabby little claws and sharp beaks, Santa would be torn to pieces trying to wrangle them.
Besides, a typical bald eagle doesn’t feed many. 25 pound eagles would present quite a threat to civil aviation were our skies to be filled with them.

Please consider printing this post as a factsheet to share with family, friends, and neighbors.

I wish you and yours the happiest of Thanksgivings and look forward to providing you with the truth about Christmas in the coming weeks.

You’re welcome,
Foxfur

Exterminator? I’ve got a rifle and a chainsaw…


A friend posted a picture on my Facebook the that brought back a great memory. It was a photo of a handgun pointed at a spider on the wall with the caption:
“I tried a shoe first but when the spider threw my shoe back at me this was my only option.”

When I was a young bachelor I lived in a one room cabin in the middle of nowhere in a town named Timber (pop. 63). My teensy abode was one of four cabins on a piece of property that used to be a church camp. The Nehalem river formed one mile of our northern border, the county road was half that for our southern frontier, west was ‘town’ and east was wilderness. Secluded is an understatement.
I enjoyed near impenetrable privacy with a measure of peace and quiet that bordered on the absurd. Until one night…
An army buddy came by one afternoon. We started out shooting the shit then started shooting at shit and, of course, ended up drinking all sorts of shit. He brought up his motorized log splitter for me to use in laying up my winter fuel stock. While we were sitting there contemplating work I said, “Hey! I’ll bet I can split that log with a 12 gauge slug!” He agreed that probably I was correct but we should do some empirical research just to be sure. I broke out the old Winchester and a box of Remington 1 ounce slugs. After 5 rounds we confirmed our suspicions and concluded that the scientific method was our friend. As scientists typically do, we headed off to the general store for some Boone’s Farm and Mad Dog. We came back to the cabin, had a few drinks, grilled up some elk steaks, had another drink, had a smoke, had some more drinks, and ended up putting nearly anything you can imagine into that hydraulic log splitter. You wouldn’t believe what amazing machines they are…
After a few more drinks he had to go home. I tottered up the steps, went inside, and flopped down on the bed where I immediately fell asleep. For about 5 minutes.
I woke up to a scratching sound. It sounded like it was in my brain. While possible it didn’t seem probable so I opened my eyes and looked at the wall to my right. There, 8 inches from the tip of my snout, was where the scratching was coming from. It seemed that a mouse or other member of the family rodentiae had found his furry little way into my wall in what he must have figured to be a perfect rent-free arrangement. I banged on the wall with my balled fist telling him I was in no mood for his crap and that I needed some sleep. It worked. My little plague carrying tenant got the message, tucked his nose in his groin and went to sleep. For about 5 minutes. I repeated my cease and desist ministrations three or four times in the next half hour but he just couldn’t knock it off…
It seemed to me that it might be a good idea to take up my .22 rifle and install a new hole in the wall with it. So I closed one eye, walked (I use that term loosely) across the room, and got my rifle. I put a few pills in it, brought it to bear on my barricaded nemesis, and let fly. Whaddya know? It worked! Satisfied with my handiwork I once again laid down and ended up sleeping through the night. A week passes.
There’s a bit of a stink coming from the holes. Duct tape! Worked like a charm. Another week passes.
I figured I’d best do it right this time. I took up some tools and jumped in. I tore off the shingles, which served as siding, from a 4 square foot area of the wall. I had a circular saw but only one blade and I didn’t want to wreck it. I thought of borrowing a saw from a neighbor but didn’t want to have to explain what I was doing with it… Then I realized I had a saw with plenty of spare blades: My chainsaw!
I fired her up and with just a deft cuts I had that wall open right quick. I fully expected to find a well perforated bucktoothed wall dweller in there. What I found instead was a fully intact mouse whose only problem was that he seemed to have forgotten how to breathe. As close as I could tell, I scared him to death.
After a little caveman carpentry I had the wall back together good enough so the landlord wouldn’t be able to figure out what kind of shenanigans has transpired without a briar pipe and a magnifying glass. Plain white Colgate toothpaste makes a fine and dandy field expedient wallboard patching compound. Write that down, it might help you out sometime.
I set up a tripod and filmed the entire extraction process with my old VHS-C video camera. I’ll poke around in the next month and see if I can’t find it and pull some screen caps…

You can’t shoot what you can’t see…


My M4 came from the factory with a mis-indexed front sight that makes the rifle better for clubbing pumpkins than shooting them…
I found these guys recently and they’re sending me a compact reflex (open holographic) scope to evaluate. I think that deserves a little plug on the blog, hmm?

Rifle Scope and Sights at Mounting Solution Plus (MSP)

Mounting Solutions Plus (MSP) is both a manufacturer of quality firearm accessories and a distributor of firearms related products. Mounting Solutions Plus is happy to add a great selection of Rifle Scopes and Red Dot Sights to the rest of our tactical accessories. Included in our current listing are: Aimpoint, BSA Scope, Bushnell Scopes, Elcan, Eotech, Horus Vision, NcStar , and Trijicon

In addition to our Rifle Scopes we carry a verity of Scope Mounts & Scope Rings.

Mounting Solutions Plus specializes in tactical mounts and gun accessories for professional and competition shooters.

Click Here to learn more.

Pot Sticker Meatloaf


A while back I had a hankering for some down home meatloaf. Meatloaf: The dish people say they hate but love to eat. Stop the hate! Eat the loaf! I didn’t have any ground moo but had a pound of ground oink in the freezer. The pork got me to thinking about making pot stickers. While good they’re also a pain in the ass to make. Takes forever and they disappear too quickly. I love the taste and texture of the filling in those li’l funbags and figured I’d make an eastern style loaf of goodness to put in my tummy. I searched out a recipe for the filling and found that they all called for napa cabbage, which I didn’t have, poo! Not a problem, I left it out. Over the course of a few loaves I tweaked the ingredients until I figured out the perfect combination.

Pot Sticker Meatloaf

For the loaf:
1 pound Ground Pork
2 Eggs
1 cup Breadcrumbs (I used Japanese panko breadcrumbs)
4 to 6 Green Onions sliced thin
8 cloves Garlic, minced OR 4 tbsp minced garlic from a jar
2 tsp Ginger, minced
1/2 can Water chestnuts, chopped finely
1 tsp Toasted Sesame Oil
4 tsp Rice Vinegar
2 tbsp Soy Sauce
½ tsp Salt
1 tbsp Toasted sesame seeds (optional)

For the sauce:
2 cups Chicken broth
3 tbsp Soy sauce
2 tbsp Sugar
1 tsp Ginger, minced
4 tsp Lime juice
2 tbsp Corn starch mixed in 2 tbsp of water
A dash or two of Tabasco sauce (optional)

Pre-heat your oven to 350 degrees F.

Thinly slice the green onions and mince the ginger and garlic.

In a big bowl mix up the eggs, soy sauce, sesame seeds and oil, vinegar, garlic, ginger, water chestnuts, and salt.

Add the ground pork to the bowl and break it up a bit.

Dump the breadcrumbs atop the whole mess and knead it all together until mixed pretty thoroughly. You don’t want to end up with a homogenous pink slime. Just mash it pretty good. Otherwise you’ll end up with a really dense loaf and give ammo to the meatloaf haters.

Throw it in a bread loaf pan. Mine is non-stick so I don’t bother greasing it. With the amount of grease that cooks out from the pork, sticking shouldn’t be a problem in anything. If you dont have a bread pan just use whatever you have on hand or shape it into a loaf and cook it on a foil covered baking sheet.

It’s shovin’ in the oven time! Immolate for 45 to 50 minutes or until it’s nice and brown on top.

While it’s baking grab a glass of wine and make the sauce.

Put the broth, ginger, sugar, lime juice, and soy sauce in a saucepan.

Heat it up until it bubbles a bit and the sugar dissolves. Turn the heat down and stir in the cornstarch water. Continue heating and stirring for a minute or so. You’ll end up with a slightly thickened awesomesauce.

Put some rice on to cook. I have a little rice cooker that I scored for 10 bucks at a discount store. I haven’t cooked rice on the stove for 15 years… This loaf goes really well with jasmine rice but use what you have. Plain white enriched rice is tasty too!

When the loaf is baked to perfection yank it from the oven and set it aside to firm up for 10 to 15 minutes. Cut into slabs as thick as you like ’em, set atop some rice, and drench it all with the awesomesauce.

Simple Cornbread For Simple People


This quick and easy bread goes perfectly with soup, chili, or just your tongue. It’s the first bread I ever baked and disabused me of the notion that I couldn’t bake.

1 cup flour
1 cup yellow cornmeal
1 tbsp baking powder
1/2 tsp salt
2 eggs, beaten
1 cup milk
1/4 cup melted butter
1/4 cup honey
1/4 to 1/3 cup sugar

Preheat your oven to 400 degrees F. If you set your oven to 400 degrees C your aluminum pan will melt and the cornbread will make your fillings hurt.

Mix the flour, cornmeal, baking powder and salt in a big bowl. You can sift them together if you wish. I never have and it comes out great every time.

Whip the milk, eggs, butter, honey and sugar in a seperate bowl or shake in a quart bottle. I like shaking them in a bottle because it counts as exercise.

Hose down a baking pan with a sprayable oil or grease it up with butter or shortening. I use a 9 x 13 inch pyrex glass pan though if you want to get all traditional you can go with the standard 9 x 9 inch pan. The larger one will give you 15 pieces whereas the smaller one gets you 9. Bacon fat works very well and adds extra yum along with bioavailable baconoids (the secret to the good life).

Dump the milky buttery goo in the bowl with the powdery things and mix until the ingredients are just wet. The batter will be lumpy and that’s a good thing ™. Don’t get carried away with the mixing. If mixed until perfectly smooth you end up with cornbrick. Still perfectly edible but it’s not everybody’s thing. If you do end up making cornbrick, have it for breakfast by putting a brick in a bowl, topping it with honey, pouring some warm milk over it and mashing it up.

Now pour the batter in yer pan and stick in in yer oven.
Let it go for 25-30 minutes or until a toothpick poked in the middle of the pan comes out clean and the edges start pulling away from the sides of the pan. I don’t do the toothpich thing anymore. I just wait until the top has turned a light golden brown and the edges pull.

Let it cool for 10 minutes and cut into as many pieces as you like.

This is a basic recipe to get you familiar with how simple it is to make cornbread. Lots of folks are intimidated by baking as it’s one of the few types of cooking that demands precision in measuring and manipulation in preparation. Cornbread defies the norm by being very forgiving of errors. Making and baking it is quite different than “normal” bread. It’s a liquid process in that you’re not cutting in your fat. There’s no rolling, punching, or rising required. Anyone can make cornbread with 99 and 44/100th’s of a percent success.

After you’ve made your first pan of it, get creative and add stuff to it when blending the wet and dry ingredients. Add some crumbled cooked bacon or minced ham or Spam.
A cup of corn niblets.
A cup of creamed corn.
A diced red or green bell pepper.
Minced onions.
Use maple syrup in place of the honey.
Throw in a teaspoon of finely chopped cilantro.
A few dashes of Tabasco sauce? Definitely.
Applesauce.
Cheese!
Sour cream? Yep.
Ricotta or cottage cheese.
A tablespoon of likker (brandy, moonshine, etc.).

Make up a pan of this to go with the split pea soup that I taught you to make in the previous post: Foxfur’s Split Pea Soup.

Split open a fresh warm piece of the bread, insert a thin piece of butter, top with honey, insert in mouth.

Make it, eat it, love it, share it.

Split Pea Soup By Email


Aargh!
One reason my posts have been infrequent as of late is that of connectivity. My truck was out of action for five weeks due to a thrown timing belt, wrecked cylinder head (bent valves), and a dud of an oil pump. Since we live in the middle of, no, at the far end of nowhere, our only internet connection is by dialup. Yep, an old timey telephone modem that connects at the lightning combat speed of 24kbps and that’s when there’s a decent tailwind blowing the bits along. WordPress pages take forever to load and I’m unable to access the dashboard to submit new posts. I usually drive to town and visit the library to use the free high speed WiFi. I finally figured out that I can submit new posts by email, so, here we go, split pea soup by email!

As seems to happen every year, the crappy, rainy weather has descended upon us in the Pacific Northwet. Nothing says “Fuck you, rain!” quite like split pea soup and cornbread.
I grew up eating Mom’s pea soup, something I thought (and indeed was) magical. It doesn’t take chanting or any major incantations to make, is inexpensive and nourishing, and the preparation complexity is on par with finger painting.

It can be as simple or as gastronomically complicated as you wish and is highly tolerant of many questionable ingredients, like me! I don’t get all fancy with organic, free-range split peas or top-shelf spices. I get the main ingredients out of the bulk bins at the warehouse discount supermarket. I bagged up a couple tablespoons of thyme and sage and at checkout the gal said they wouldn’t register on the scale so she gave them to me for a penny a bag!

Most recipes I’ve seen use plain water as the soup base. A base ain’t a base unless it has flavor. What? I can haz flavor? Yes. Yes you can.
I love to use chicken broth, er, loved to use it. Then I found Knorr ham boullion cubes at the Vietnamese / Thai market hole in the wall market I visit from time to time. These are cubes the size of a pat of butter and make 2 cups each, less unwrapping, more cooking. The hammy goodness that this broth brings to the soup blast it into another dimension and will, if you’re as normal as I am, render all other pea soups unpalatable.

Another ingredient you won’t find in Paula Deen’s cookbooks is mushrooms. Again, no exotic spotted grotto cave mushrooms picked by silky-handed virgins and transported to the store with Bach sonatas serenading them. Plain old white mushrooms folks. I’ve made it with criminis with no discernible difference. I recommend sauteing these in butter with some minced garlic. After they pull off their shrinkydink trick and get nice and brown, pour in a few tablespoons of dry sherry or wine. Cook and stir until most of the liquid is gone.

Bacon! If you have the time to include bacon, include bacon!

Most recipes call for you to add the produce in its raw form. I’ll do this when I’m short on time or out of wine and lack the inspiration for a long makeout session with the stovetop. Sauteing the veggies, preferably in bacon fat (except the mushrooms), really deepens the flavor and will reduce the overall cooking time.

Foxfur’s Split Pea Soup

8 cups chicken or ham broth
1 pound green split peas
2 to 10 strips of bacon, cut up into 1/2 inch pieces (optional) 1 carrot, diced
1 onion, chopped
1 shallot, diced (optional)
10 – 12 white mushrooms sliced and then cut in half
2 tbsp butter
1/2 tsp sage
1/2 tsp thyme
1/4 tsp black pepper
2 cloves garlic, minced OR 1 tsp minced garlic from a jar
1/2 tsp salt

Put 8 cups or 2 quarts (quarts are tastier!) of water in a biggish pot on the stove. Add your bullion cubes or powder. Set it to boil while you sort your peas as described below.

Put the dry peas in a bowl and cover with cold water. Stir with your paws to make any hulls float up and pitch ’em. Pick out discolored, shriveled, and otherwise unsavory characters. Pick out any gravel that may be in there. Why is there gravel in split peas? Do they sweep the peas around parking lots to get the hulls off? Tumble ’em in a cement mixer to do so? Who knows…
Rinse the peas in a colander and toss in the pot of boiling yum. Boil for around 5 minutes and then turn it down to a low simmer. A proper low simmer has a small amount of small bubbles bubbling up at a small frequency.

Add the sage, thyme, pepper, salt, and half the garlic to the pot. Simmer for an hour, stirring occasionally.
While it simmers you’ll prepare and add the veggies.

Throw the bacon in a frying pan set on medium. Fry to your preferred texture. For soup I’ll cook half of it floppy and the other half crispy. Toss in the pot and stir.

Pour all but a couple teaspoons of bacon fat out of the pan and add onions and shallots. Leave on medium and saute until translucent. Add the carrots and cook for another 2 – 3 minutes. Toss in the pot and stir.

Drop the butter in the pan. Allow it to melt completely then add the remainder of the garlic. Fry it up for 10 – 20 seconds then add the mushrooms. Stir or flip to distribute the butter amongst the mushrooms. Cook until the water in the pan is gone and the butter is soaked up. I like to add a few tablespoons of dry sherry or wine and cook down until the likker is pretty much soaked up. Toss in the pot and stir.

Remember, sauteing the veggies is optional. The mushrooms, if you decide to add them, really must be sauteed.

After an hour the peas should be getting mushy. This is the way I like mine and is the only way to make true split pea soup. If the peas are simply tender and still intact then it’s just pea soup. Know the difference.

Let it go until it reaches your standard of goodness. I let mine simmer for 1.5 to 2 hours. If it’s too thin, simmer a bit longer. Too thick? Add water.

Ladle into a mug or bowl and suck it down! Stir in a pat of butter if you’re feeling decadent or a tablespoon of mayonnaise if you’re feeling weird.

There are all kinds of things you can add to the soup as it cooks; ham, Spam, whole peas, corn, diced potatoes, cream, Tabasco or other hot sauce, etc.
Once done I like to add a small pinch of dill leaves that have been scrunched up with the fingers. It’s Germanish and wonderful. You can omit this your first time if you wish or add if you really like dill. It is far more delicious when accompanied by cornbread with butter and honey.

There you go. Homemade split pea soup. Try it, you’ll like it!

Excuse Me, Your Dog Is On Fire – Burning Man 2012


The highlight of my 2012 Burning Man experiences?
Burning a dog. A five story tall dog. A climable wooden statue of the Egyptian god Anubis.
Anubis is identified variously in mythology as the god of mumification and the afterlife, a protector of the deceased and their tombs, a Lord of the Underworld, and that his black color represents the fertile black soil of the Nile valley symbolizing rebirth.
The last part of the above is, for me, the real tie-in with the theme of Burning Man this year, Fertility 2.0.

From Chief Dan Fox, the lead designer and builder of Anubis:
“Anubis represents both the ephemeral and the eternal, the single moment of a phase change. Through the work, I hope to convey to participants a reflection of what they take and hold from the festival when they depart. Anubis is the companion from this life into the hereafter, and it is with that sense of frailty, nakedness, and solitude that we ultimately carry the message of unity, companionship, and strength we find at Burning Man into the default world.” http://www.anubis2012.com

To me, Anubis represented one thing specifically:
The opportunity to commit an artistic act of arson. The goal of the pyrotechnician is to entertain people with fire in its manifold forms. Anubis 2012 represented a unique medium to a practitioner of the fire arts. A “normal” firework show is pretty routine. Set the mortars, load the shells, light the shells (see the tag cloud on the homepage for previous posts). This job was anything but  normal. It was an enormous work of art, a work that took hundreds of dedicated and skillful hours to complete, a work not finished with the final nail, a work completed only upon its destruction.

Anubis was built to burn.

It takes a special kind of artist to conceive and execute a work that is destined to be consumed by fire. This kind of art has a temporary physical lifetime and then passes into the afterlife of memories where it lives on for eternity. It was a deep honor to be invited by the artists to participate in the destruction of their creation. It is one thing to have someone buy and give you a bunch of fireworks and pyro devices to set and shoot but quite another for an artist to show you to their canvas and be asked to reduce it to ashes.

We, Captain Smashy, Espressodude, Helga, Wally (the Anubis pyro lead), and I among others (Oh yeah! A very pretty gal wearing just boots, a skirt, and a smile, yay!), composed the Arson Crew tasked with burning the dog. We spent the better part of Friday building, loading, and wiring the various pyro devices. Jack, the head of Black Rock FX, delivered the pyro to us, made suggestions, gave direction, and lined out a path of continuity for us. Then he said GO!

The pyro load (approximate from recollection):
30 multi-shot cakes, from 19 to 200-shot, in four different flavors.
10 Mine bags.
40 Whistling cakes.
5 5-second quick whistles.
2 Fountains.
50 Road flares cut into 150 pieces.
100 Gerbes in the form of 2 setpieces.
4 High-intensity illumination flares.
4 Fuel mines (ghost mines).
4 Concussion mortars.
20 Gallons of diesel.
20 Gallons of colored methanol.
6 Marine distress flares.
1 Cord of seasoned eucalyptus.
Nearly a mile of wire, 50 e-matches, and 100 feet of quickmatch.

The sequence of ignition in rough order, again from recollection:

2 200-shot cakes, shooting in a fan pattern. These served as a draw to attract the crowd as well as people who were across the playa waiting for the Burn Wall Street installation to burn. It was cancelled but news is hard to disseminate out there…

The illumination flares, behind shrouds on each of the 4 sides of the dog. VERY bright. They lasted about 1 minute.

The whistling cakes mounted on the chest and back. These lasted more than a minute and gave a unique effect as they shrilled away. A chorus of whistles with standing waves and odd beat frequencies.

The quick whistles blew out of the top of its head in a heavenly direction. I thought they were going to stay put. I like them much better now. I didn’t see these before they were loaded but from the sound you’d think they were the size of your arm…

The methanol buckets. 5 gallon buckets with electrically-ignited marine distress flares in the bottom were lined with trash bags and filled with methanol (wood alcohol). When the flares ignited, the meth bags burned through releasing a cascade of burning fuel through the hole in the side of the bucket where the flare was inserted. The methanol was mixed with various chemicals that gave the otherwise colorless flames some panache. There were several meth cues over the next minute.

The diesel buckets. The eucalyptus wood was palletized in 2 bundles and placed directly beneath the base of the statue. John made demo cuts to direct the flames up through the dog in a chimney effect for a fast burn. These were prepared identically to the meth buckets. When the flares ignited, the diesel bags burned through releasing a cascade of burning fuel down upon the cordwood.

The eyes of the dog had the gerbe (small fountains the size of a fat pencil) setpieces attached to them and lit up on cue making Anubis cast a fiery glare upon the crowd.

The ear fountains started up. I thought they’d be higher up but whatever, they burned and made lotsa sparks. I worked the ground crew, others did the vertical sets.

About now the mine bags started blowing. These were trash bags filled with leftover bits of fuse, stars, comets, small class C devices, and other pyro floor sweepings. Lots of crazy, delicious, dangerous shit wrapped up like tea bags. They were nailed to the exterior and not matched (fused). They depended on the kindness of wayward flames to light ’em up.

The multi-shots came next. These were set up on the four corners of the installation. There were 3 cues: (8) Exotic Mash, (4) Extreme Intensity, and (8) Red Alert (all Cannon Brand). If aerial fireworks are legal where you live, I highly recommend all of these. If they aren’t, go somewhere where they are and bring some home.

The remaining 4 200-shot cakes. The tubes in these cakes are upright in the center of the long axis (rectangular footprint) and spread out fan style from there. Very similar to mortar fan racks but much more rapid in firing. They remind me of the Iraqi anti-aircraft fire over Baghdad during the 1991 ass kicking we gave good ol’ Saddam after he got all touchy feely with Kuwait. These cakes were absolutely spectacular! They’re Lidu brand so it’s no surprise…

Then came the fuel mines and concussion hits.
A fuel mine is a steel tube filled with a liquid fuel, typically gasoline, and uses a sealed black powder charge to expel the fuel and ignite it. It produces an angry orange and black mushroom cloud fireball and can leave a giant black smoke ring afterward if the conditions are right. It makes one helluva whoosh-bang and the radiant heat wave can be felt at surprisingly long distances.
The fuel mines we fired are called ghost mines because we used methanol instead of gasoline. Using methanol and colorants gives the effect of clear, colored fireballs without the thick black smoke. Titanium sponge was added to the black powder charges to insure ignition after expulsion and can be seen as white sparks drifting out of the fireball.
A concussion mortar is a cylindrical steel billet, 3 to 4 inches in diameter and 5 to 7 inches long, with a 1 inch axial hole bored to within an inch of one end. It’s a big, strong steel cup that’s filled with standard 70/30 flash powder and electrically matched. On ignition it sounds like a cannon. They’ll make your bowel growl and your liver quiver.

Finally, all that was left were the chunks of flares nailed to the side of the platform. A few went up before the collapse with the rest igniting in the pile o’ fiery goodness.

The dog was pointed perfectly into the wind. The flames trailed behind it like fur. The eddy behind the blazing canine blended the wind with the extreme thermal turbulence provided by the hellacious blaze and spawned many fire devils. Smoke devils, too.

4 minutes and 25 seconds after the first pyro ignited, Anubis collapsed.

Blah blah blah, on to the pics and video…
One of the better videos I’ve run across is this one:


Jake (build crew) and Espressodude (pyro crew) discuss various demo cuts and Armageddon scenarios.

A diesel bucket atop cordwood in the base of Anubis. The flare can be seen through the hole. The wires lead to the firing slat and then on to the firing board.


Exotic Mash 19-shot cake.
E-match > quickmatch > OEM visco. Don’t try e-matching directly to visco. Dark skies suck and angry customers suck even harder.


Red Alert 25-shot cakes.


The product description on the Extreme Intensity 90-shot cakes.
Sounds about right for Burning Man…


Some fucko, Foxfur or something, wiring up a cake.
I used to get busted for doing shit like this.
Licenses are handy!
Mine bags are visible in the background.


Multiple wire runs. Each run is a separate cue with all devices wired in series for simultaneous ignition.


Captain Smashy wiring up another Extreme Intensity crazycake.


Chief Dan Fox – Artist, builder, scallywag.
(And lots of bare asses in the background…)


A temporary slat to keep the cues separate.


One corner’s pyro load. This one has an extra 200-shot cake.

The above photo shows 6 of 7 cues:
– 2 19-shots
– 2 25-shots
– 1 90-shot
– 1 200-shot
– 1 200-shot ‘draw’
– 1 fuel mine
– 1 concussion mortar (Not set in place yet)
The 2nd 200-shot cake is one of 2 (the other is on opposing corner) that served as ‘draws’. They were fired 10 minutes prior to the show in order to draw spectators from the Burn Wall Street burn which was supposed to go up at 9:30 PM. The show was scrubbed and Anubis was moved into the slot. On firing the 2 200-shots, people at BWS would see them and say “What’s that? Let’s go over there!”


A wide shot showing three corners and the plywood shrouds where the illuminating flares were placed.


The fuel mines and concussion mortars firing.


A video I ran across features a gal saying “They sound like guinea pigs!” when the mine bags ignite. Some whistly bits in the bags chirped and shot around on ignition…

A huge thank you to Dan, Jacob, John, and the rest of the Anubis crew, Jack and the Black Rock FX crew, the Anubis perimeter crew, and to the burners who made it all possible. The Anubis burn was THE highlight of my burn this year.
I look forward to the opportunity to burn shit next year and doing my best to Keep Burning Man Potentially Fatal.

I’m trying to trade one of my shirts to Patrick for a free and clear copy of this photo.
I’d really like a clear view behind the watermark, heh…

Fireworks, Fasteners, and Fabulous Food


This is my busy season. Fireworks shows, fun in the sun, and prepping for Burning Man. Rather than writing the thousands of words that I’d like to, I’ll post a dozen pics instead.

Wheee!

Mad Max and the Zen of Exterior Decorating


What started as a simple paint job has taken on a life of its own. Each day I see something that can be added or improved upon. Each day brings more WTF looks, WHY? comments, and COOL! compliments. In addition to the appearance enhancements, I have been treating Rambette to many badly needed structural upgrades and powerplant maintenance services. These last two have me at around $1,500 which isn’t as bad as it initially sounds. I’ve saved massive amounts of money by changing the oil every 30,000 miles (instead of 3,000 miles as recommended by big oil and their whores at the motor oil companies) and neglected nearly every other maintenance procedure. You know the old saw about not fixing what’s not broke… Rambette is at 108,000 miles and still going strong.
Recent maintenance points:
New engine oil, differential & transfer case gear oil, power steering fluid, brake fluid, and engine coolant & thermostat
New spark plugs and wires
New shocks, coil springs, and sway bar end links
New mass air flow & throttle position sensors
New parking brake shoes
New PCV valve and hose
New driver’s side power mirror
New serpentine belt and idler pulley
New front CV halfshafts (axles)

All of these I have done myself and saved a couple thousand dollars in the process. Most of these things YOU, dear reader, can do for yourself. All it takes is a manual, a little bit of time, and suspension of disbelief in yourself. You may have to buy some tools but the cost of these is inconsequential in the big picture. You will still save money, lots of it, and have some pretty cool tools to mystify your friends with.

Recent appearance upgrades include:
Tail light blackouts
Hood, body, and trim details
Lift points on the hood
More paint…

Enough words, more pictures!

To get to the spark plugs, remove this…

And these…

And you’ll end up with this:


Installing the new axles. Foxfur loves him some big and sexy tools. The ratchet drive handles pictured are 3/8, 1/2, and 3/4 inch. The 3/4 inch drive handle is not absolutely necessary but sure is handy. The set I have (Proto) will cost you around $600 unless you can find a used set. Mine were free. Right time & place and all that.

New at the top, old at the bottom. The old rubber boots were torn and letting in dirt and crap. It took less than 1 hour per side. To put that in perspective, the spark plugs took 3 hours. It would have been faster but me & Mr. PBR took our time…

Struts, coil springs (and new tool: spring compressor!), cabin filter, MAF, TPS, PCV, etc.

On to the appearance upgrades.

The tail lights were so bright as compared to the paint job that I decided it was time to balance them out. I initially used a tinting spray:

It’s from VHT. I wasn’t very impressed. It’d be ok for building a normal rice racer but looked a bit too glossy for Rambette. I remasked the lights and shot them with flat black.

I came up with the design on the fly and ended up with this. Now it looks like this:

They are nice and bright at night but look cool as hell 24 hours a day.

A friend posted this pic of a Hyundai Elantra on my Facebook page:

Find the entire story here.

It gave me the idea for my next project.

I had a box of 500 3/8 x 1 inch long stainless steel bolts lying around just waiting for that special project. In just 24 hours it went from this:

To this:

The lift points are simple 1/2 x 5 1/2 inch U-bolts from the hardware store.

I also got my veterans license plates! $34 to the state. If you’re a vet please look into getting yours. It will increase public awareness of just how many of us are out there and will allow vets to identify each other.

One night last week I was out in the front yard testing out Grizelda MK VI, my fire poofer, after upgrading the accumulator with an old 5 gallon propane tank. The accumulator allows more on demand volume for poofier flames.

What once looked like this:

Now looks like this:

And just for poops and guffaws, I decided to see how it would look atop Rambette:

Seriously.
Get off my lawn.

Another recent project having to do with Burning Man (besides Rambette and Grizelda MK VI) has been stencils. You saw the BURN SHIT one above. The other one is “KEEP BURNING MAN POTENTIALLY FATAL” which is a plea to the organizers to not try too hard on the whole safety thing. Not that they’re going to, but, with 60,000 people there and an estimated 70,000 in coming years, it represents a real threat to my enjoyment of dangerous good times in the desert.

One more Burning Man related score. I found some hot short shorts that match my orange unsafety vest!

Until next time…


Cooking with Foxfur: Free Tatas!


We buy our eggs fresh from a farmer friend down the road. We’re always eating eggs; fried, scrambled, omeletified, in fried rice, etc. My favorite way, by far, is to use them in frittatas!

A frittata is kind of like an omelet but has the fixins throughout the eggy goodness instead of atop or inside. I call ’em garbagepail omelets because I’ll throw in whatever’s handy. Too much veggies to fit in last night’s skillet? Have a leftover slice of ham? Is that damned neighbor still smothering you in zucchini? Chop ’em up, throw ’em in. For those of you who have been suffering through reading my blog for a while, you might have caught on to a recurring theme. Lotsa whatever combined creatively resulting in tasty vittles.

This frittata recipe is for four people and is cooked on a stove instead of in an oven. As is usual with my recipes, this recipe is merely a guide that gives methods and theories. If you want to add a little of everything, great! If you want to load it with six bell peppers, wonderful!

Free Tatas!

4 Eggs
1 Small zucchini, diced
1 Small summer squash, diced
1 Small onion, sliced
1 Bell pepper, diced
1 Cup diced mushrooms
8 pieces crumbled bacon cooked to your preference
OR
1/2 Cup diced ham
OR
1/2 Can diced Spam
1 Cup shredded or grated cheese
2 Tablespoons Milk

Beat the hell out of the eggs and milk in a bowl or used quart yogurt container (Foxfur’s favorite). Add salt, pepper, etc to taste. I like to add 2 tablespoons of sweet chili sauce and a teaspoon of mirin. Add the cheese and beat well. Set aside.

If you’re using bacon, reserve some grease to saute the veggies in. Spam will provide a bit of grease as well though not as much. You won’t need to drain it.

Spam. It’s what’s for breakfast!

I go for 1/2 inch diced cubes on the Spam.

When the meat is almost done, toss in the veggies (except mushrooms) and saute until crisp-tender. Add the mushies if you’re using them (you really should be…) and go for another 2 minutes.

Don’t worry if it looks like you have too much good stuff in the frying pan, it is simply not possible. The eggs will always find their way through.

Now beat the egg / cheese mixture once again and pour over the veggies somewhat evenly so the cheese is equitably distributed.

Shake the pan to move the veggies around and spread them a bit so as to preclude bitching about Timmy getting more meat than Susie…

Slap a cover on the pan and let it go on medium heat for 8 to 10 minutes. You’ll have to figure out the heat and time that your stove works best at but unless you scorch the hell out of it, it won’t be a problem. We like the bottom of ours a bit past brown.

Here’s a peek at the tatas halfway through the thermal coagulation period:

You’ll notice I’m cooking on a hotplate. I actually do most of my cooking on it. Cooking on our electric range feels like I’m in a cave. I like cooking out on the island in our kitchen. I do the same for stir-fry cooking with a West Bend electric wok. Sometimes I’ll cook on an open fire in the front yard…

Once you no longer see any eggy goo on the top of your creation, it’s done!

DONE!

Let it sit for 5 to 10 minutes, quarter it up with a spatula, and sling onto plates.

I made one yesterday morning with red, orange, and green peppers, red and Walla Walla onions, squash, zucchini, olives, fried potatoes, bacon, prosciutto, crab, and avocado. Oh hot damn!

Frittatas are good for breakfast, lunch, and dinner. They’re good at room temperature or cold from the fridge. I throw a coupe slices in a ziploc bag and carry ’em in my pack for a lunch on the trail. They’re great sandwiched between pancakes or waffles. They rock when topped with sour cream, ketchup, Tabasco sauce, more cheese, or any combination of the above.

This 4 egg frittata serves four people comfortably. I’ve never scaled it up as it’s just Sweetpea and I eatin’ on it. It should scale up just fine. Please let me know how it works out for you either as a 4 egg or an 18 egg monstrosity.

Cooking with Foxfur: Kitsune Tofu Salad


This one is for Serenity, a fellow WordPress blogger, and my friend Jenny who saw the photo I put up on Facebook (I like to tease my friends with foodporn).

I had a tofu salad at a very nice Japanese restaurant 15 years ago. I was looking at what I had left for food stocks the other day and decided I’d try to recreate it. Not only did I come close, I surpassed the original.

Kitsune Tofu Salad

1 14 ounce package extra firm tofu, drained
1/4 cup soy sauce
1 tablespoon mirin (sweetened rice wine)
2 teaspoons sesame oil
1 tablespoon rice vinegar
1 clove garlic, minced
1 teaspoon fresh ginger, minced
1 large tomato, seeded and chopped
1 small onion, sliced paper thin
2 Tablespoons chopped cilantro
Sesame seeds

Free the tofu from its plastic prison and slap it on a plate. Place another plate on top of Mr. Tofu and put a few cans on top to press it down a bit. It Mr. T starts to crumble, I pity you, fool. The idea here is to press lots of water out of the tofu so it will be able to soak up the yummy dressing it will eventually be bathed in. The ‘fu will need to be squeezed for up to an hour. Pour off the expelled ‘fu juices every 15 minutes or so. After draining, cut it up into 1/2 to 3/4 inch cubes.

Mix the soy, mirin, vinegar, sesame oil, garlic, and ginger in a cup. I added a teaspoon of sugar the second time I made it. It was pretty good but I think I like it better without. If you have kids, they may be more likely to eat it. The second time I made it I also sauteed the garlic and ginger to see what it was like with them a bit crispity. Yum! It’s not necessary but kinda fancy…

Combine the ‘fu, tomatoes, and cilantro in a serving bowl. I like to get in there with my fingers to mess it up real good. Follow your heart here. Don’t worry it the ‘fu crumbles a bit. You’re never gonna get it Cooks Illustrated perfect. I sure don’t. Pour the dressing over the salad and mix it around a bit more. It’s just great right after you finish it and possibly a bit better after an hour or so in the fridge.Shake some sesame seeds on top of each serving before eating.

If you don’t have mirin, either don’t worry about it, or, go out and get some. I use it in everything from marinades to stir fry sauces.

Red onions give the dish a nice look. I ended up using Walla Walla sweet onions and it blew my mind.

By the way, kitsune is fox in japanese.

Enjoy

Cooking with Foxfur: Foxfur’s Black Bean Salad


Last month while blowing shit up at a friend’s house, his wife made the most deeelicious black bean salad I’ve ever tasted. Hers was much more involved than this recipe but again, my aim is to show those who think they can’t cook that they actually can and quite well at that.

Y’all know I’m not big on measurements. I play fast and loose when I make this stuff (much like I typically conduct my daily affairs). Well, Sweetpea likes it so much that she wants to make it when I go out of town so she made me calcumalate whatall it takes to do it right. Now you, dear reader, get to reap the benefits.

This is an easy one. If you can drive a spoon, you’ll do just fine.

Foxfur’s Black Bean Salad

  • 2 Cans black beans
  • 1 Can corn
  • 1/2 Red, orange, or green bell pepper, minced or chopped
  • 1/2 Onion (red is real purty), minced or chopped
  • 5 – 6 Grape or cherry tomatoes
  • 12 – 15 chopped black olives (about 1/3 cup)
  • 1 Tbsp finely chopped cilantro
  • 2 Tbsp Oil
  • 2 Tbsp Lime juice
  • 1/2 Tbsp Lemon juice
  • 2 Tbsp Sugar
  • 1 Tsp Salt
  • 3 Shakes + 1 Dash Black pepper

First off, open the cans and rinse the veggies well! This is the secret to good bean salads. The thick goo in the bottom of the beans does not look good at all and will earn you detention with Foxfur. After draining, throw ’em in a great big bowl. One big enough to toss the stuff around in and lose less than a few spoonfuls.

Wash and slice up the onion and pepper. I like using Vidalia sweet or red onions. As stated above, reds are all purtylike. For peppers, red is really dazzling and gives the best contrast, orange will make your hair soft and silky, and green peppers will allow you to find parking spots up to 40% faster! Why no yellow? Because it looks like the corn, silly! Here’s a place where color coordination just doesn’t work. The only coordination I want to see here is in the form of manual dexterity adequate enough to ensure a complete absence of severed digits in your completed salad. When done, toss ’em in the bowl.

While we’re on the subject of peppers,

Get a good look now, kids. OK, let’s move on…

Olives: You can buy the pre-chopped kind but they’re three times more expensive than whole olives. After rinsing, smash them flat with the side of your knife or machete then chop coarsely. Then, yep, toss ’em in the bowl!

Tomatoes > Chop > Bowl.

Wash and finely mince the cilantro and then? The bowl? Nope. Set aside for the moment.

Now pour the oil, juices, sugar, salt, pepper, and cilantro into a container with a splatter-proof cap and shake the living crap out of it. Then pour it in the bowl.

Getcha a big spoon and stir well. Toss and turn to mix it all up. Now I’d suggest putting it in the fridge for an hour or two to let it stew in its juices and get all flavory but I’d never ask you to do something that I wouldn’t do myself. Hell, dig in! If there’s anything left over it’ll taste even better the next morning (if that’s even possible).

I highly recommend doubling this recipe. One batch doesn’t usually see the light of day at the Foxes den…

Gas Cans: Less Safety, More Fun!


One of my hot buttons is when people try to protect me from myself. In some cases this might be tolerable but those are few and far between. What am I bitching about? The adult-proof ‘safety’ cap / spouts on gasoline cans. They take too many hands to operate!

Here we have two gas cans:The one on the left is modified while the one on the right is not. Yet. Also shown is a pair of diagonal cutters necessary for the following upgrade.

Here are the two ‘safety’ items I despise. The spring-loaded “Lock – Pour” lever and the thumb busting cap lock.

I’m all for safety, just ask my friends (!). But, when some ne’er do well safety faker shoves their hot buttered ‘safety’ features in my foxhole, well, I don’t take too kindly to ’em. Probably some condo dwelling cityslicker who’s never mowed a lawn in his life, hmm? Back before people got all worried about children playing with matches and gasoline we had the venerable 5 gallon jerry cans with a mouth so wide you can land a match in it from across the living room.

In the lower right you see a flexible metal spout that we affectionately called the donkey dick in the army. Why? I don’t have a clue.

So, wanting to go back in time to when things were simpler and less safe, I wanted an easier way to use my newfangled gas cans. I don’t savor having to use features I’m not interested in and didn’t ask for let alone ones that are inconvenient and clunky. While this might sound thickheaded, I never had any problems with using a donkey dick or even the plain, wide open plastic nozzle. I never had any leaks around the cap that a thumb busting ratchet assembly could ever have helped. ‘Safety’ feature creep has gone on for years and has reached the level of insult and I’m not going to take it lying down. The reasons for over regulation are manufacturer’s fear of liability from stupid people who’ve had to pay the stupid tax after setting themselves on fire (eugenics by fire) and the nanny-state adult babysitters at the CPSC (Consumer Product Safety Commision). I’m not just sticking it to the man, which is loads fun all by itself, but also asserting my first amendment right to the pursuit of happiness. Enough ranting (for now).

Here’s a view under the handles. The black one has not been modified, the green one has. You can see the black plastic ‘spring’ on the unmodified one. It is what forces the dispense switch back to the store position when the dispense handle is pressed and causes it to lock as soon as it’s released. In order to dispense again you must move the switch back to the pour setting.

The diagonals are pointing at the spot that must be cut.

The ‘spring’ as cut and removed. It requires quite a bit of cutting force to cut through. A utility or x-acto knife may be used in place of the diagonals.

The switch in the store (locked) position:

The switch in the pour (unlocked) position:

The thumb busting cap lock. It is forced to engage with the tank mounted locking tooth by two plastic ‘springs’ at the top end of the cap.

Here’s where to cut the springs. After cutting the first one, cut the other one just like the first.

The thumb busting cap lock as removed.

After removing the flexible spout from the filler neck you can use the cap from it to seal the can. We store our cans outside (you should too) so it keeps the rain out of the spout.

Again, these ‘safety’ features, once removed, do not make the cans any less safe when used correctly. I would not suggest removing them if you have small or dumb children running around willy-nilly and irresponsibly unsupervised. Older children can be taught to either keep their grubby paws off the damned cans or to use them responsibly in the same way that you teach them that knives are sharp and can significantly reduce the number of useful fingers installed on their hands.

The self relocking feature is completely unnecessary for adults. Imagine if your car doors had the same feature to prevent unauthorized opening thereby preventing fingers being trapped between it and the car body. If you can remember to lock your door or turn a power switch off after using an appliance then you should be able to remember to lock the can handle after use.

One thing that should be considered is that your insurance company might be less than impressed if you had a fire and they discover that the ‘safety’ features had been tampered with. Luckily for you, gas cans are quite flammable and any evidence of tampering should be quickly melted into oblivion seeing as how the fire will most likely occur near the can. In the unlikely event that the can is not destroyed by the fire, well, I’ll leave that problem up to you.

So there you go. Foxfur has taught you how to remove ‘safety’ features from dangerous objects and how to commit insurance fraud. Not bad, eh?